There’s something deeply satisfying about seeing a motorcycle you built with your own hands. The rumble of the engine, the gleam of the chrome, the feel of the throttle all take on new meaning when you’ve assembled the bike yourself. While building your own bike may seem intimidating, with the right approach, a good workspace, and a quality kit, you can transform a pile of parts into a road-ready masterpiece.
Before getting started, it’s important to understand what to expect from the process. This guide walks you through the mindset, preparation, and techniques for your first DIY motorcycle kit build. Whether you seek customization, craftsmanship, or the joy of riding something you assembled, the journey from parts to pavement is worth taking.
Why Build Your Own Motorcycle?
Building your own motorcycle can save money, create a unique bike, and offer the reward of hands-on accomplishment.
By assembling your bike, you gain mechanical confidence and skills for both riding and maintenance.
Preparing for the Build
Before you rip open the box of your kit, preparation is key. A little organization and planning will make your build go smoother and reduce frustration later.
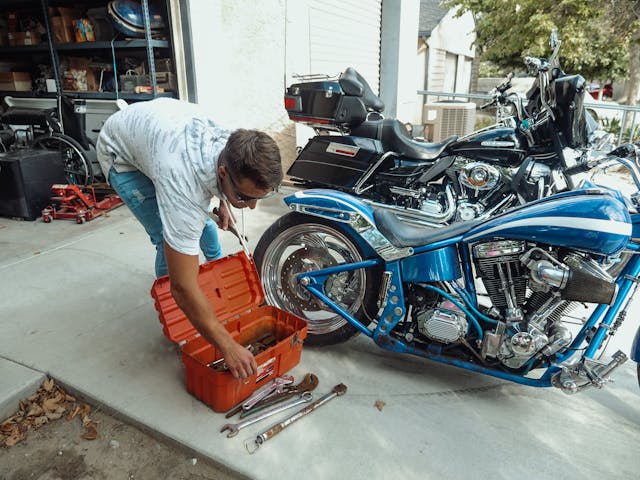
Create a Clean, Organized Workspace
Ensure there is sufficient room in your garage or workshop to lay out all your parts without clutter. Good lighting is essential—overhead lights and a portable work lamp can make all the difference when you’re handling small components.
Gather the Right Tools
Most DIY build moto kits will list the tools you need, but having extras on hand is always a good idea. A quality wrench set, screwdrivers, Allen keys, a torque wrench (which helps you tighten bolts to a specific strength), pliers, and a good socket set are all essentials. If you’re serious about custom work, a lift stand (which raises your motorcycle to a comfortable working height) can make the job much easier on your back.
Read the Instructions Thoroughly
It’s tempting to dive right in, but take time to read through the manual before turning the first bolt. Understanding the full process helps you anticipate tricky steps and avoid mistakes that could cost you time and money.
Step-by-Step: The Core Build Process
Every motorcycle build is unique, but the general stages tend to follow a similar path.
Frame and Suspension Setup
Your bike’s frame is its backbone, so this is where most builds begin. You’ll attach the front forks, rear suspension, and swingarm. Ensure everything is aligned correctly—slight misalignments here can lead to serious handling issues down the road.
Engine Installation
The heart of your motorcycle deserves careful handling. Most kits include a pre-assembled engine, but you’ll still need to mount it correctly. Connect the exhaust system, fuel, and electrical systems with care. This step often requires patience and precision, since a misaligned mount can lead to vibration or performance issues.
Wiring and Electronics
Electrical work may sound intimidating, but many kits come with pre-labeled wires and connectors. You’ll install the battery, ignition, lighting, and instrument cluster. Keep your wiring neat and secure with clips or wraps to prevent damage. Loose wires can lead to shorts or malfunctions.
Wheels, Brakes, and Controls
Once the bike is starting to take shape, it’s time to mount the wheels, brake system, and control cables. Double-check that all brake lines are properly bled (removing air bubbles from brake lines to ensure proper braking) and that controls respond smoothly before moving on.
Tips for a Smooth Build Experience
Key tips: Take reference photos, be patient and precise, test fit parts, and keep hardware organized for a smoother build.
- Take Photos as You Go – If you need to disassemble something to make an adjustment, having reference photos can save you from having to guess how it all fits together.
- Stay Patient – Some steps will take longer than expected. Don’t rush; precision matters.
- Test Fit Parts Before Final Assembly – This means temporarily assembling parts to check alignment and fit before permanently securing them with tools. This helps ensure everything aligns correctly before applying torque (tightening with the correct force) or using a thread-locker (a chemical that prevents bolts from loosening due to vibration).
- Keep Hardware Organized – Small labeled containers or magnetic trays can prevent lost bolts and screws.
Common Mistakes to Avoid
When working with DIY build moto kits, beginners often make the same errors:
- Skipping torque specs can be a costly mistake. Tightening bolts “by feel” sometimes strips threads or lets them come loose. Always follow torque settings.
- Ignoring Safety Checks – Before your first ride, double-check all fasteners, brake function, and cable routing to ensure safety.
- Overlooking Alignment – Wheels, handlebars, and forks must be straight for safe handling.
- Don’t neglect fluids. Check that the engine oil, brake fluid, and coolant levels are correct before starting the engine.
The First Start-Up
There’s nothing like the moment you fire up your newly built bike. This is when your work pays off. Before you hit the starter, run through a pre-start checklist:
- Fuel in the tank
- Oil at the proper level
- Battery charged and connected
- Brakes tested
- All bolts double-checked
Once everything’s in order, turn the key, press the starter, and listen as the engine roars to life. You’ll feel an immediate sense of pride knowing you built it yourself.
Taking It to the Road
Your first ride should be about testing, not speed. Take the bike to an open, low-traffic area and pay attention to how it handles, brakes, and accelerates. This is your chance to make adjustments before heading out on the open road.
Be sure to break in new components per the kit guidelines for safe and long-lasting performance.
The Joy of Customization
Building your own motorcycle doesn’t end when the build is done. You can continue to tweak, upgrade, and customize your ride to match your style. Whether it’s a new paint job, a custom seat, or performance upgrades, the possibilities are endless.
Also Read: Bicycle and Pedestrian Accidents: Safety Tips and Legal Recourse
Final Thoughts
Key takeaway: A DIY build offers skills, understanding, and lasting satisfaction you can’t buy.
From unboxing the parts to hearing the engine roar, every step of the journey becomes your story. When you ride something you built yourself, you’ll understand why many riders say the build is as thrilling as the ride.