Accidental deletion of photos from hard drives is a distressful experience, especially when you lose memorable pictures. There are several reasons, like user error, sudden power outages, formatting, virus or malware, etc., why pictures get deleted on any device. Luckily, there are multiple photo recovery methods as well that you can apply to recover deleted photos from hard drive.
In this comprehensive guide, we will explain some methods to help you learn how to recover deleted photos from hard drives.
Can I Recover Deleted Photos from Hard Drives?
Yes, it’s possible to recover deleted photos from hard drives. When you delete any picture from the hard drive, it is not immediately erased; instead, the space it was occupying will be marked available for new data. To enhance recovery chances, it is good to avoid saving new files on that drive. Utilize reliable photo recovery tool like Stellar Photo Recovery to restore deleted photos in no time.
Before you apply any recovery methods to recover lost memories, you need to find the exact cause of such data loss issues. Some prominent reasons why pictures get deleted from hard drives are as follows:
- You may have accidentally deleted the picture from your hard drive while organizing files or cleaning up its storage space.
- Formatting a hard drive deletes all data stored on it, including photos. It is good practice to create backups of important files before you format any storage drive.
- File system corruption can cause software or hardware issues, which result in data loss issues, including photos.
- Overwriting occurs when you save new data in the same location from where files were deleted. It reduces the chances of successful recovery.
- Abrupt power outages or system crashes while performing file operations can cause data corruption and sometimes lead to the deletion of files, including photos.
Quick Methods to Recover Photos from Hard Drives
Now that you are familiar with the reasons for the sudden deletion of photos from hard drives, it’s time to learn how to recover deleted photos. Here are some commonly used photo recovery methods that you can apply to restore lost memories:
Method 01: Check the Recycle Bin or Trash Folder
Every deleted file on Windows and Mac devices goes to the Recycle Bin and Trash folder, respectively, before being permanently deleted. Deleted photos remain in that folder for only 30 days, after which they will be permanently deleted from the device. To recover lost photos from the Recycle Bin/Trash folder, you need to:
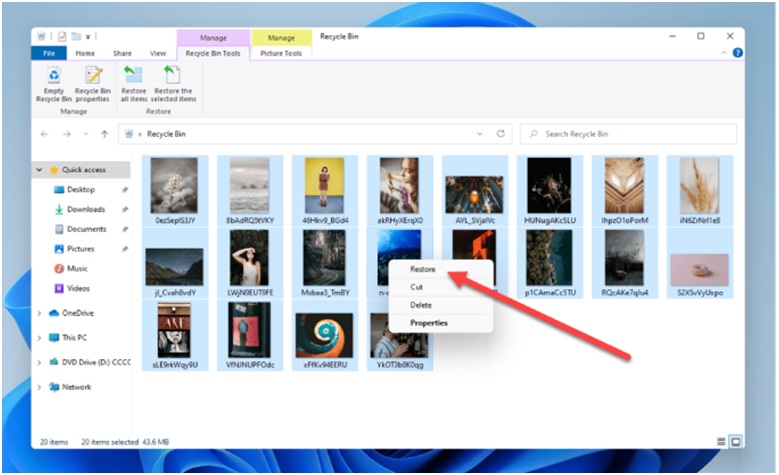
For Windows Users:
- Firstly, double-click on the Recycle Bin folder located on the desktop to open it.
- Now, locate and select the deleted photos that you need to restore. Right-click on any of the selected photos and select the “Restore” option to save them to the original location.
For Mac Users:
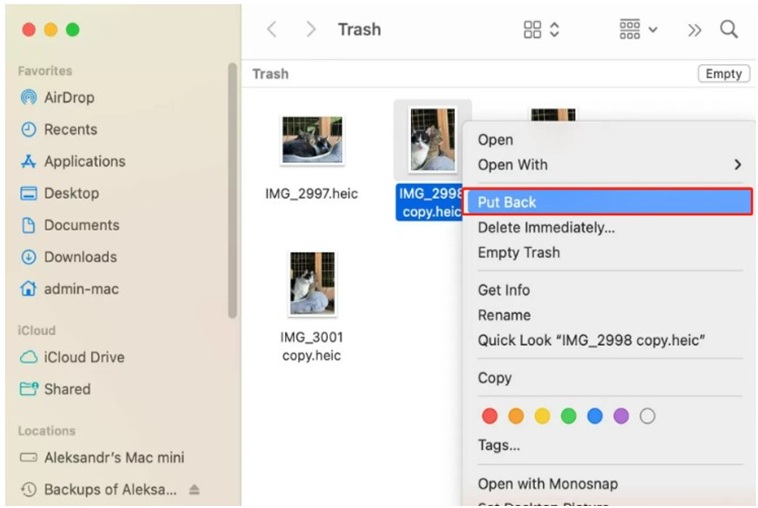
- Launch the Trash folder and locate the deleted photos.
- Right-click on any of them and select “Put Back” to restore them to their original location.
Method 02: Use File History or Time Machine Backups
If the deleted photos are not available in the Recycle Bin or Trash folder, you should try checking the available backups. If you have a habit of creating backups of important files, then you might have your lost photo stored there. Windows and Mac users can try using the File History and Time Machine backup utilities respectively to create backup of important files and folders and to restore deleted data.
For Windows Users:
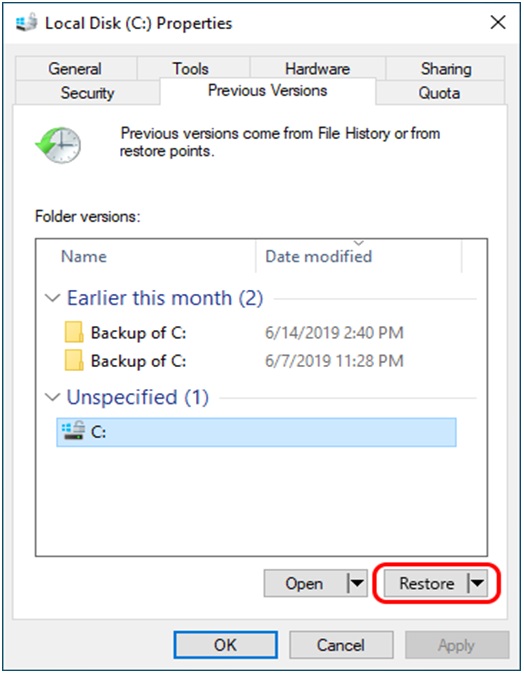
File History is a Windows built-in backup tool which allows you to restore previous versions of deleted files if enabled on your device. For this:
- Go to the folder where your deleted pictures were earlier stored.
- Right-click anywhere inside the folder and select Properties.
- Now, go to the Previous Versions tab and choose the version of the file you need to recover.
- Click the Restore button to save selected files back to your device.
For Mac Users:
If you have enabled the Time Machine backup option on your Mac device, follow the below-given steps to recover deleted photos:
- Connect the Time Machine backup drive to your Mac.
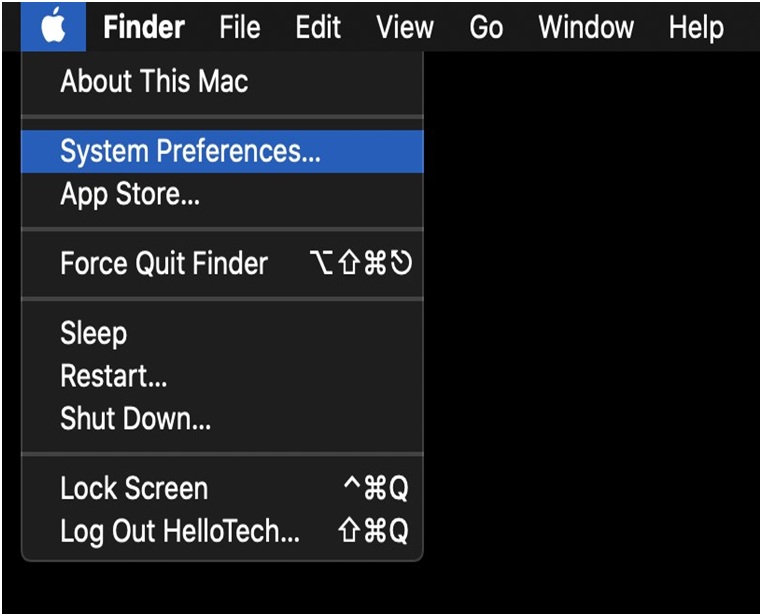
- Launch System Preferences and click on Time Machine.
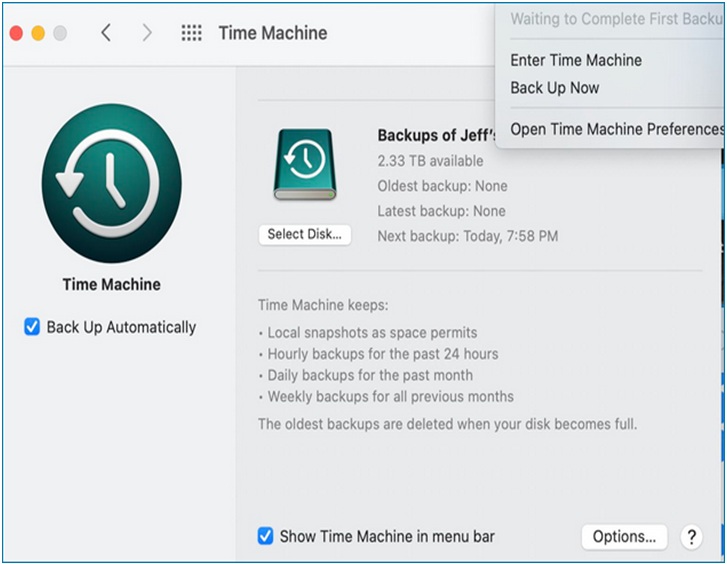
- If Time Machine is not enabled on your Mac, toggle the switch to turn it ON. Once enabled, click the “Enter Time Machine” button.
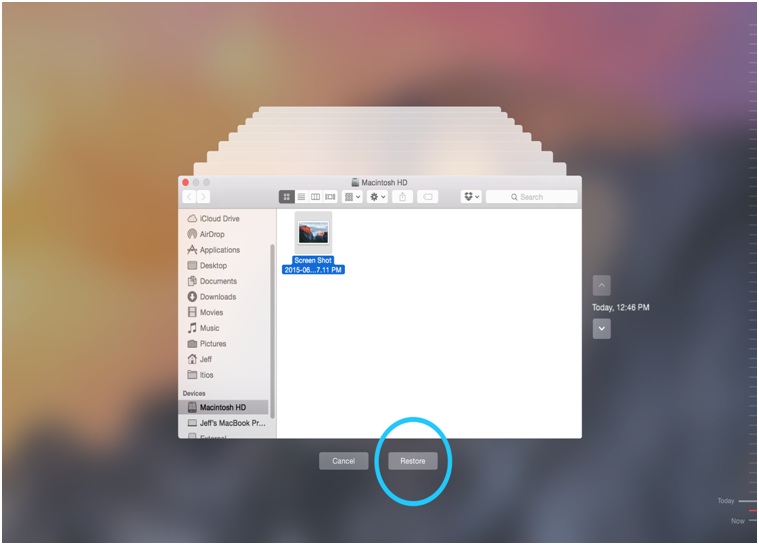
- Go through the backup interface and open the folder that contains your deleted photos. Use the arrow keys to select all the pictures you need to restore.
- Lastly, click the Restore button to save selected photos to their original location.
Method 03: Use Professional Photo Recovery Software
If the above-mentioned manual methods fail to recover photos deleted from hard drives, then you should try using a professional photo recovery software. Stellar Photo Recovery is an amazing tool that supports the recovery of photos deleted due to any reason, including accidental deletion, virus attacks, formatting, etc. You can use this tool to recover photos of any type, including JPG, JPEG, TIFF, GIF, PNG, and many more. Not only pictures, the software also supports recovery of deleted audio and video files of multiple file types in the same way.
- The Stellar Photo Recovery software can recover deleted multimedia files from any internal and external storage devices, such as Hard drives, SSDs, USBs, Memory Cards, etc.
- The software is compatible with both Windows and Mac devices. Even it supports the recovery of photos from iPhone and Android devices.
- It allows you to preview the recoverable files, so you can select and save only the required files on your device.
- Supports recovery of RAW image files of popular camera brands, such as Nikon, Canon, Sony, etc.
Let’s check how to recover deleted pictures from hard drives using the Stellar Photo Recovery tool.
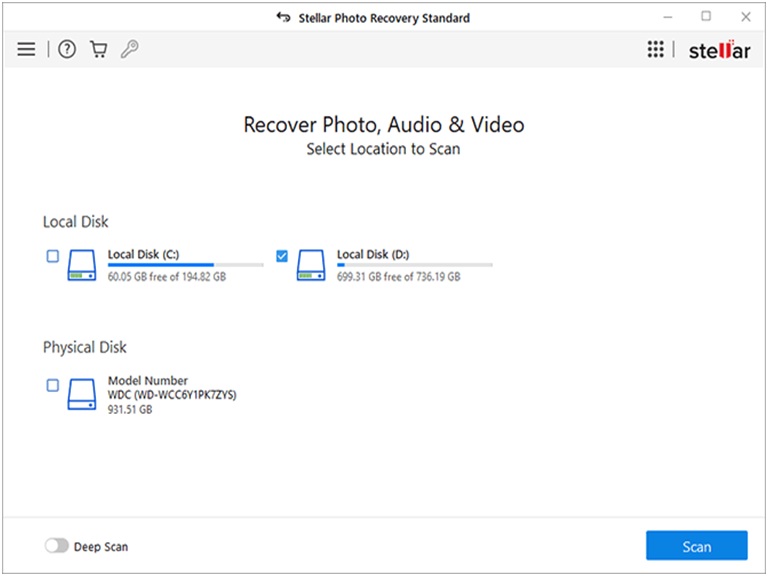
Step 01: Launch the Stellar Photo Recovery tool on your Windows/Mac device after installing it. From the homepage, select the storage drive where your deleted photos were earlier stored and click Scan.
Step 02: When the ‘Scanning Completed Successfully!’ message appears on your device screen, preview the recoverable files and select the files that you need to save back.
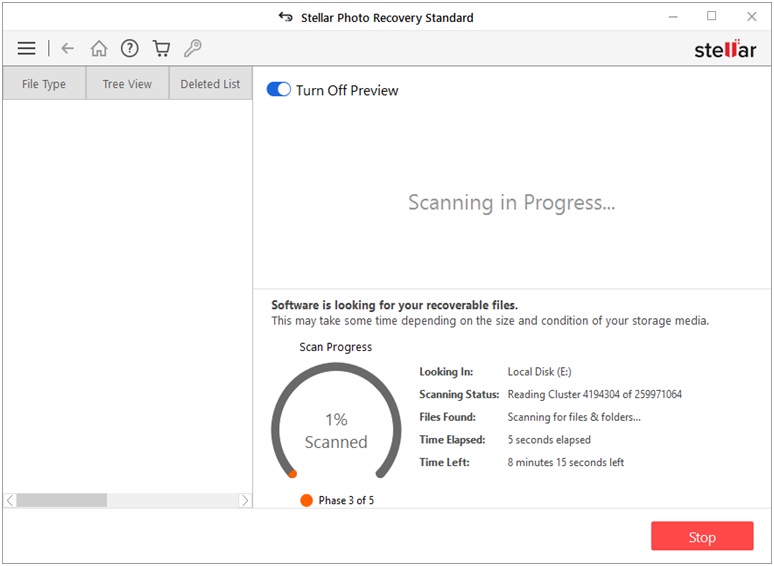
Step 03: Click the Recover button to save selected files at the desired storage location.
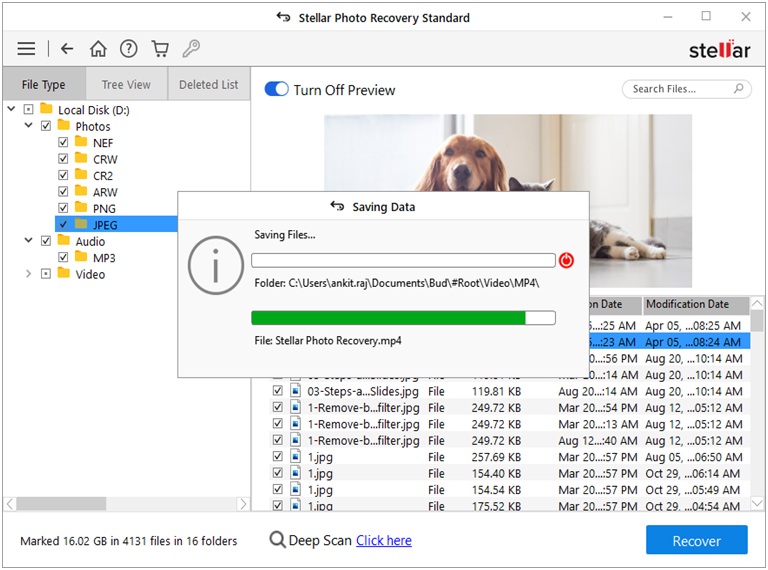
That’s it! Once you are done with the above photo recovery steps via the Stellar Photo Recovery tool, check if you can access those photos on your device.
Also Read: Mancoding AI’s Quick Text-to-Image Conversion
Wrapping Up
When you encounter issues like sudden loss of photos on your Windows or Mac devices, go with the above photo recovery methods to get deleted pictures back. If manual methods to recover deleted photos seem time-consuming, you can try recovering your precious moments via third-party photo recovery software, like Stellar Photo Recovery. The key is to act promptly and efficiently. Remember to stop using the hard drive immediately and turn on backup options to prevent the loss of valuable photos on your hard drive.


